FAA Advisory Circular 43.13-1B
Acceptable Methods, Techniques, and Practices
Aircraft Inspection and Repair
AC 43.13-1B | 3. Fiberglass and Plastics | 1. Repair of Light Load Laminate Structures | 3-4. Sample Bagging and Curing Process
AC 43.13-1B
9/8/98
(3) Make a sandwich by laying a second
layer of peel ply over the patch before cutting
it to the required size and shape. Sandwiching
will prevent the patch from raveling when cut.
Brush a good coat of resin over the scarfed
area. Remove one piece of peel ply from the
first patch and lay the patch in place. Work all
of the air out of the resin and remove the top
peel ply. Cut the next larger patch so it will
overlap the first patch by at least one-half inch.
Remove one piece of peel ply from this patch
and center the patch over the first one. Work
all of the air out of the resin. Continue laying
in patches, each overlapping the one below it
by at least one-half inch, until you have the re
quired number of layers (see figures 3-5
and 3-6) plus an extra ply to restore original
strength to the repaired area.
FIGURE 3-6. Symmetrical layup same as original num
ber of plies, plus one extra ply.
(4) Cover the entire repair with peel ply
and carefully work out all of the air bubbles
from the resin. Apply pressure over the repair
with tape or sandbags and allow it to cure.
After the repair has cured, remove the excess
resin by filing or sanding the surface to the
contour of the original part. Smooth the sur
face with fine sandpaper and refinish it to
match the original part.
(5) An alternate layup method that
works equally well is to place the larger patch
over the scarfed area first, and then each sub
sequent smaller patch over this. Both types of
repair are finished in exactly the same way.
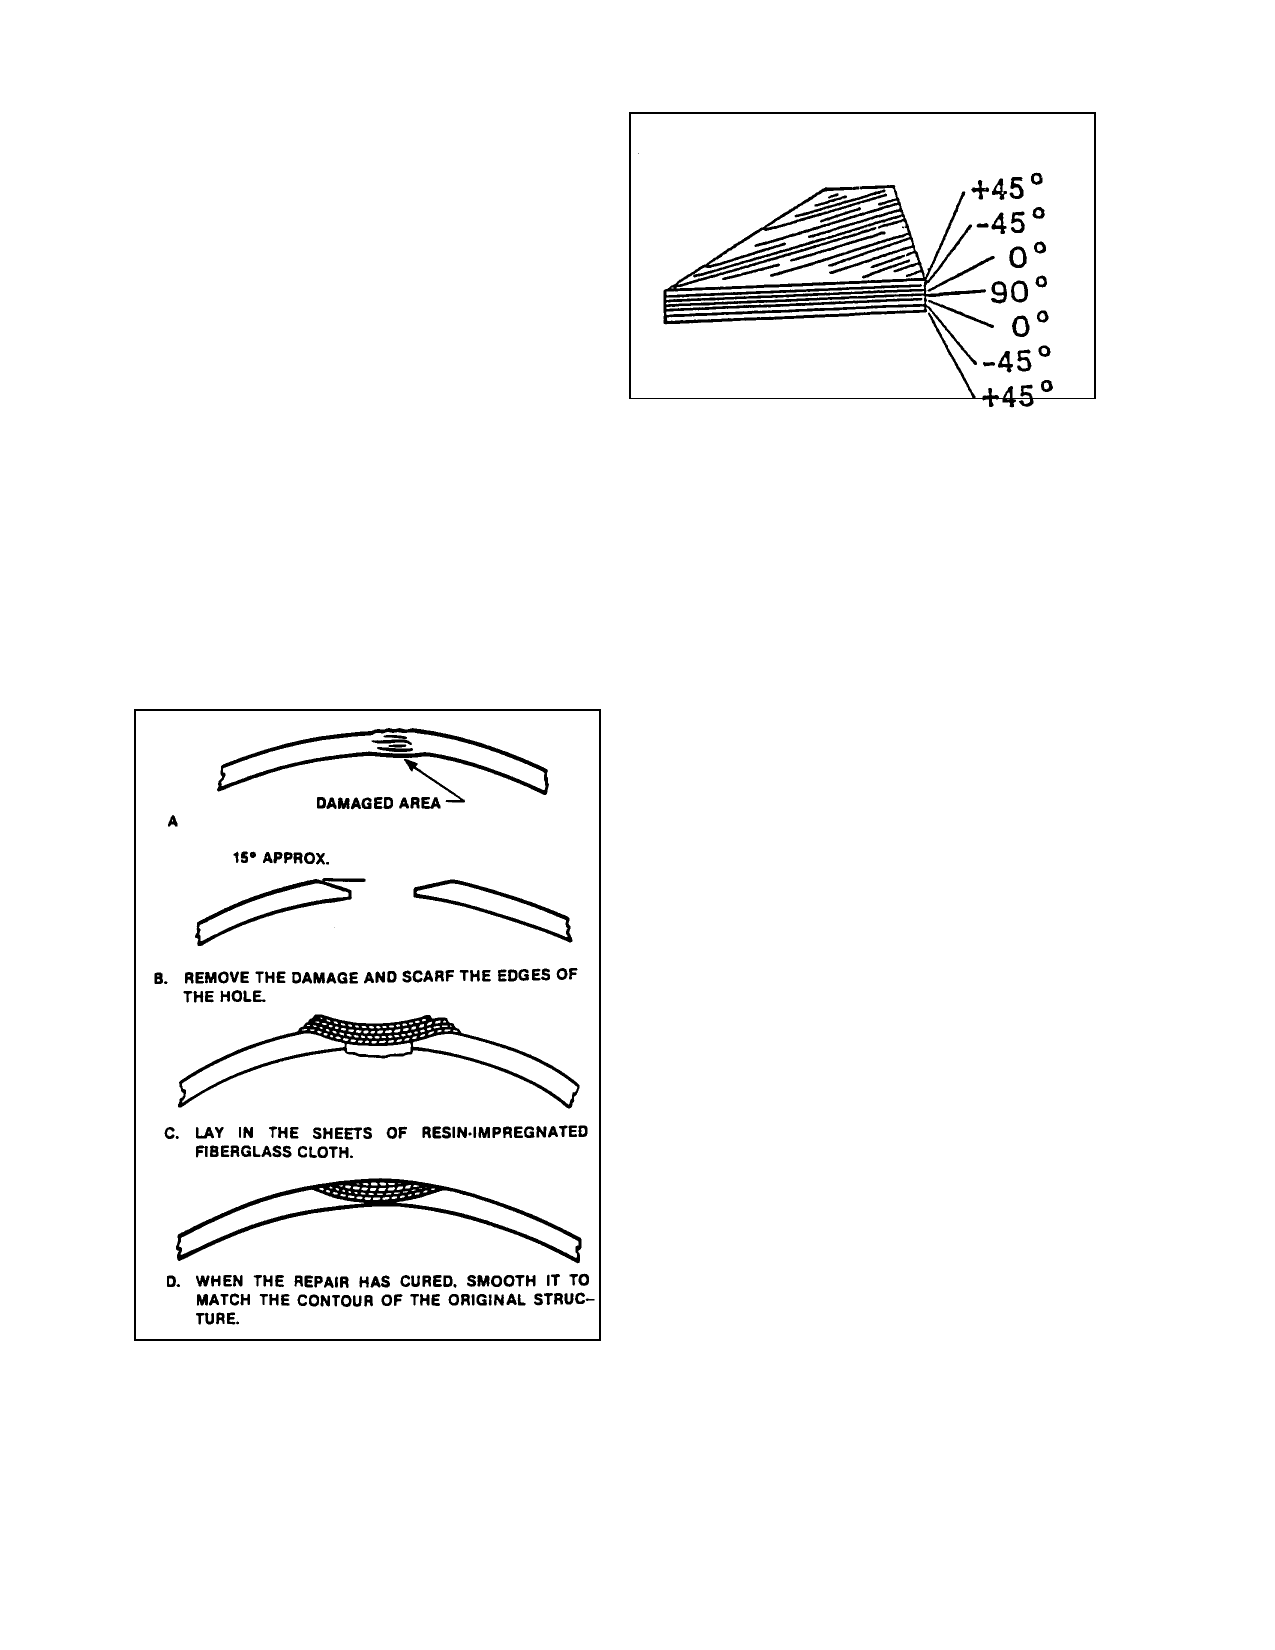
(6) The scarfed joint method (see fig
ure 3-7) is normally used on small punctures
up to 3 or 4 inches in maximum dimension and
in facings that are made of thin fabric that is
difficult to peel.
FIGURE 3-5. Scarfed repair to a nonstructural laminated
fiberglass component.
b. Step-Joint Method. The scarf method
of repairing a laminated fiberglass face sheet
of a honeycomb structure is the easiest method
to use. In this type of repair, the damage is
outlined with a compass. If a square or rectan
gular repair is more appropriate then the dam
age is outlined using a straight-edge and a
compass to round out the corners.
Page 3-4
Par 3-3