FAA Advisory Circular 43.13-1B
Acceptable Methods, Techniques, and Practices
Aircraft Inspection and Repair
AC 43.13-1B | 3. Fiberglass and Plastics | 2. Metallic Sandwich Secondary Structure Repairs | 3-11. Finishing
AC 43.13-1B
(2) A core plug should be fabricated as
follows. Select the core density. Cell size and
ribbon direction and thickness should be at
least the same as that used in the original con
struction. Trim the sides of the plug to a loose
fit in the routed cavity. Trim the plug height so
the top of the plug sits .001 inch higher than
the level of the original surface. The core will
compress and set during cure thereby requiring
the extra height. Carefully remove the
trimmed core plug from the machined cavity.
Use a vacuum cleaning device to remove any
dust or particles remaining on the core plug or
in the repair area. Clean the core plug by
rinsing with an approved solvent and wrap the
plug in a clean polyethylene bag until needed
for assembly.
9/8/98
CAUTION: When handling film ad-
hesives, prepreg fabrics, or parts with
prepared surfaces, latex gloves must
be worn.
(3) Using a film adhesive, the core plug
should be installed as follows. Select the ap
propriate adhesive film. Cut one disk of adhe
sive to the same shape and size as the perime
ter of the repair cutout if the repair extends
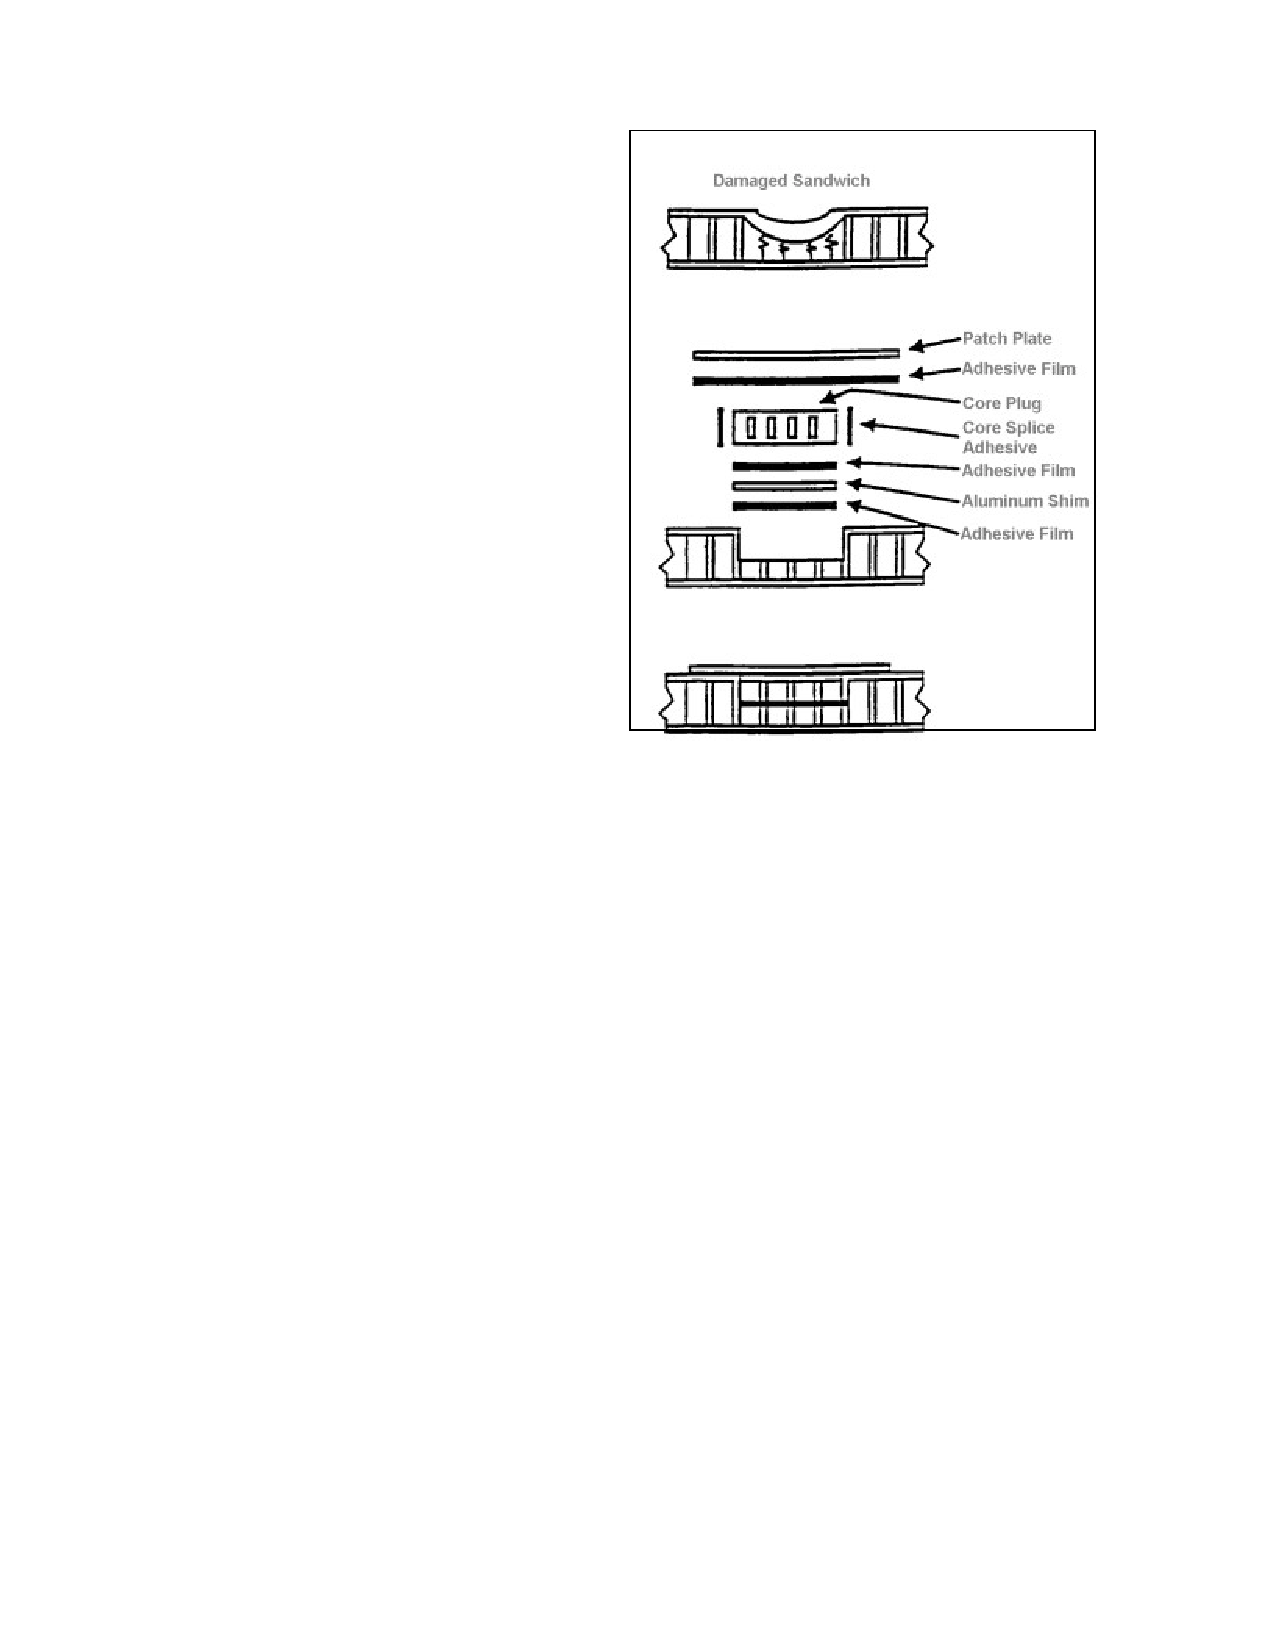
through the entire core thickness. Cut two
disks if a partial depth core repair is being
made. Cut one strip of core splice adhesive to
wrap around the core perimeter to its full
depth. For a partial depth core repair, also cut
out a fiberglass or aluminum disk, again
matching the size and the shape of the repair
cutout. Figure 3-16 shows the details of a par
tial depth core repair. Preassemble the pieces.
(4) Wipe the bottom and sides of the
cutout area with solvent. Allow the area to
dry. Insert the core plug assembly with splice
adhesive applied to the perimeter into the core
cutout. Ensure the core plug ribbon direction
matches that of the parent core. In the case of
a partial depth core repair, the plug and disk
FIGURE 3-16. Details of core repair.
may be cured to save time. Some restraining
method, such as vacuum bagging, may be de
sirable over the core splice adhesive as this
material usually foams up and out during cure.
Cure the adhesive according to the manufac
turer’s directions and allow the area to cool.
(5) Trim the top of the cured core plug
flush with either the original core or the mold
line, depending on the type of laminate repair
to be performed. Proceed with laminate repair.
3-11. FINISHING. The type of finish
coating applied to a metallic sandwich repair
will normally be determined by the exposed
material and the application of the part or as
sembly. Rain erosion of plastic parts, the need
for electrical or dielectric properties, and/or the
necessity for anti-corrosion coatings must be
considered when the choice of finish is made.
Plastic-faced parts such as radomes are fin
ished primarily for rain erosion while alumi
num- or other metal-faced laminates are
Page 3-12
Par 3-10