FAA Advisory Circular 43.13-1B
Acceptable Methods, Techniques, and Practices
Aircraft Inspection and Repair
AC 43.13-1B | 3. Fiberglass and Plastics | 2. Metallic Sandwich Secondary Structure Repairs | 3-10. Repairs to Metallic Sandwich Secondary Structure
9/8/98
AC 43.13-1B
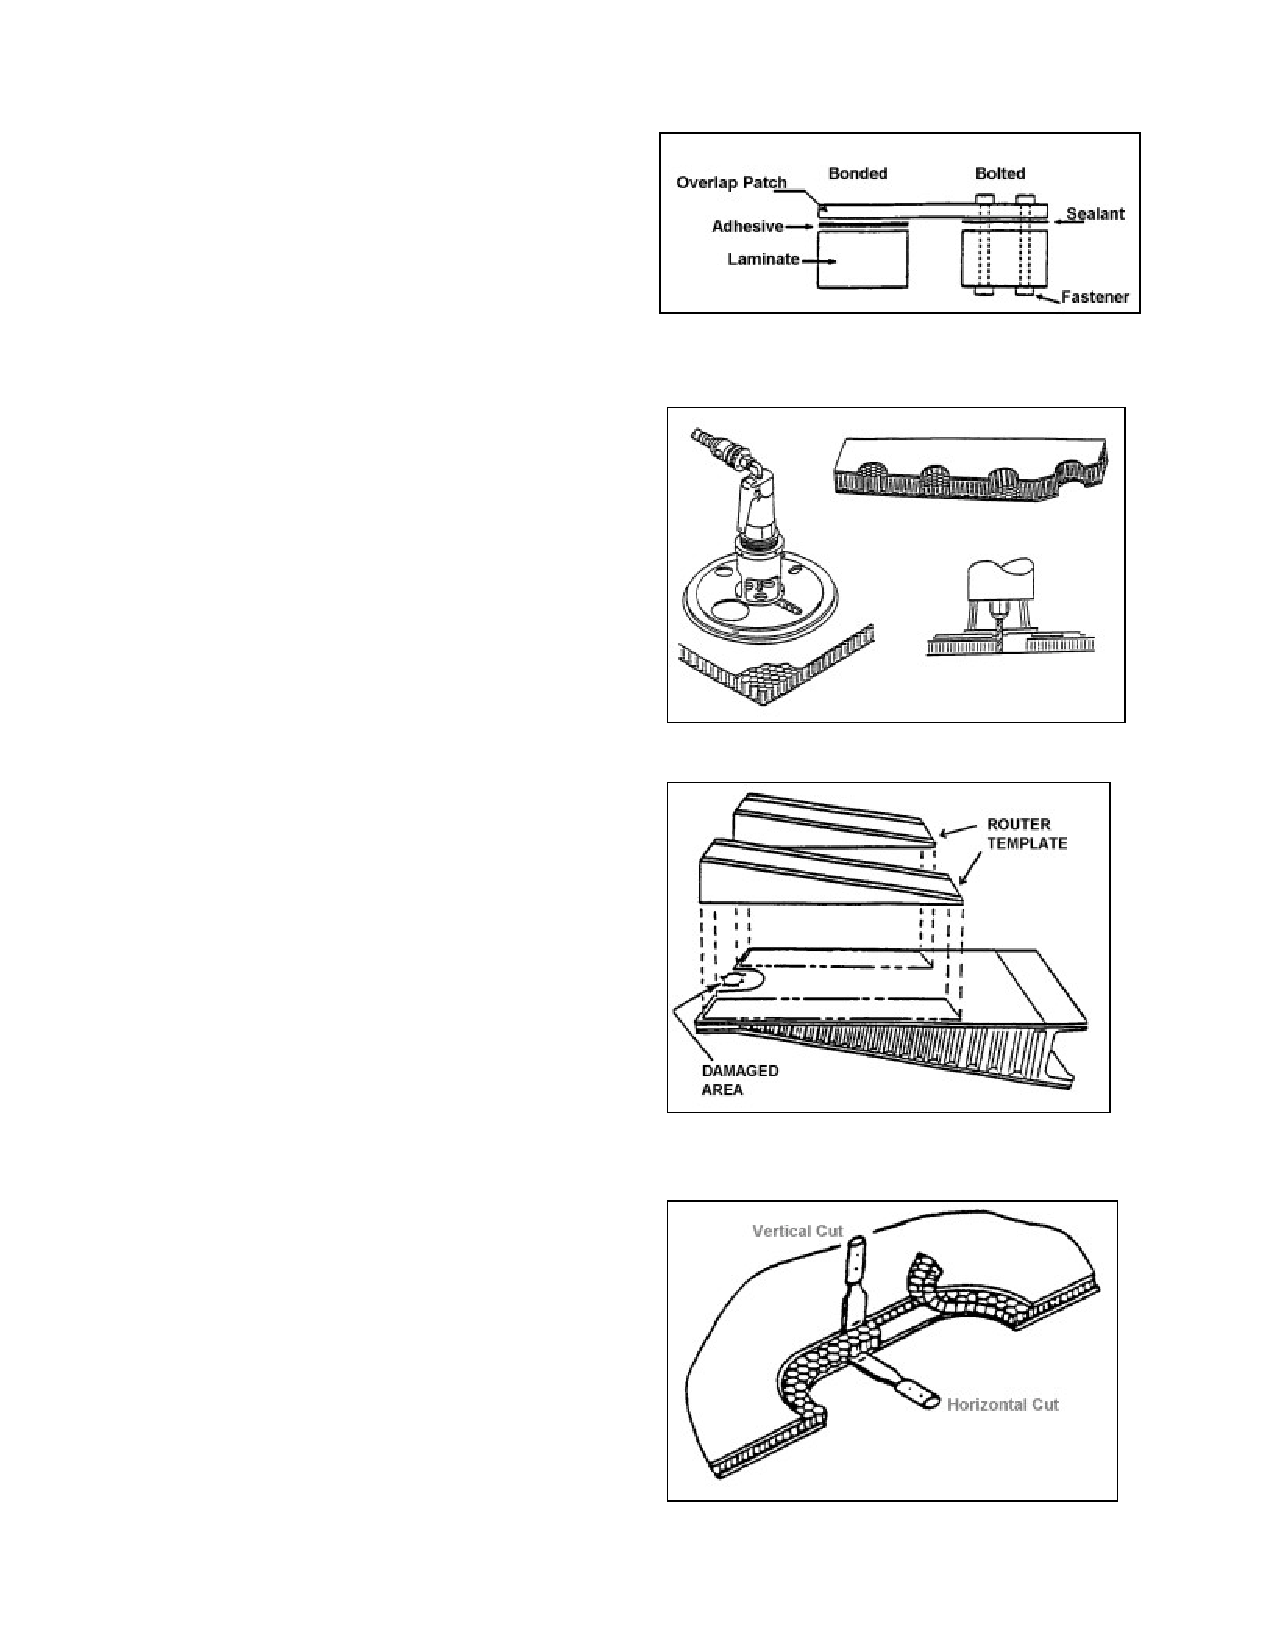
(1) It may be necessary when routing a
tapered section such as an aileron to use a
wedge-shaped block between the routing tem
plate and the upper surface. This will allow
the router to cut the core material parallel with
the lower surface. (See figure 3-14.)
(2) Select the appropriate potting adhe
sive as recommended by the manufacturer.
Mix a sufficient quantity of filler to fill the
hole and add microballoons if they are needed
to serve as a filler. When the resin and filler
are thoroughly mixed according to the manu
facturer’s recommendations, pour the mixture
into the hole filling all of the cells, then work
out all of the bubbles with a toothpick. If per
forming an overlay repair fill the core cavity to
slightly above the part’s surface. If performing
a flush repair, fill the core cavity to slightly
above the original core.
FIGURE 3-12. Cross section of bonded and bolted over
lap repairs.
FIGURE 3-13. Honeycomb core removal.
(3) Cure the compound according to the
manufacturer’s directions. Trim the top of the
cured potting compound flush with the surface,
for the type of repair you are performing.
h. A core plug repair replaces damaged
core material with a shaped piece of similar
core material.
(1) Complete removal of core material
to the opposite face generally requires some
hand-cutting with a core knife. Figure 3-15
shows core material being removed with a core
knife. The core can be peeled away from the
skin bond using duckbill pliers. Sanding is
then required to remove irregular accumula
tions of adhesive from the undamaged inner
face. Remove only enough adhesive to pro
duce a smooth finish.
FIGURE 3.14 Removing honeycomb core from a
tapered control surface.
CAUTION: Care should be used
when peeling core material from thin-
skin sandwich face sheets, because the
skin can be damaged by pulling on the
core.
FIGURE 3-15. Removal of core with core knife.
Par 3-10
Page 3-11