FAA Advisory Circular 43.13-1B
Acceptable Methods, Techniques, and Practices
Aircraft Inspection and Repair
AC 43.13-1B | 2. Fabric Covering | 1. Practices and Precautions | 2-11. Stitch Spacing
9/8/98
AC 43.13-1B
next rib lace location with the cord and knot
remaining on top of the fabric surface as illus
trated in figure 2-5, figure 2-6, and figure 2-8.
An alternate method is to route the needle un
der the fabric and out through the next lace lo
cation, then back down through the wing as
illustrated in figure 2-9a through figure 2-9c.
A modified seine knot is then tied as illustrated
in figure 2-4 through figure 2-9c.
(1) Rotate each lace loop to place the
knot at the side of the rib cap to reduce the
protrusion and aerodynamic interference be
fore moving to the next lace location, or the
cord routed under the fabric to the next lace
location as illustrated in figure 2-9a through
figure 2-9c. The end cord is then cut off leav
ing a minimum of 1/4 inch stub. Lacing ten
sion should be uniform.
aircraft manufacturer, should be reinstalled in
the same location and spacing as installed by
the original aircraft manufacturer. The lace
cord is routed around the stringer, rib cap, or
other structure using an appropriate length,
single or double pointed, curved needle as il
lustrated in figure 2-11. Blind laces are tied
with a square knot, then pulled tight and se
cured with a half hitch at each side. The lace
may be rotated to place the knot under the fab
ric surface before cutting the cord.
(2) Repeated pulling of long lengths of
lacing cord may remove wax coating from the
cord and cause fraying. Convenient lengths of
rib lacing cord may be used to lace long or
thick ribs. The end of each length is tied off
with a half hitch as illustrated in figure 2-9c, or
if needed, separate lengths of lacing cord may
be joined by using the splice knot illustrated in
figure 2-10.
(3) Lacing is installed through other
components, where applicable, in the same
manner as a wing. Single, wide space lace at
tachments, usually used on empennage sur
faces, are tied with a square knot and half hitch
on each side, the same as a starting wing rib
lace illustrated in figure 2-9a, steps 1 and 2.
The lace may be rotated to place the knot un
der the fabric before cutting the cord.
e. Blind lacing on a fuselage, wing rib
caps above and below a fuel tank, and any
other component, when used by the original
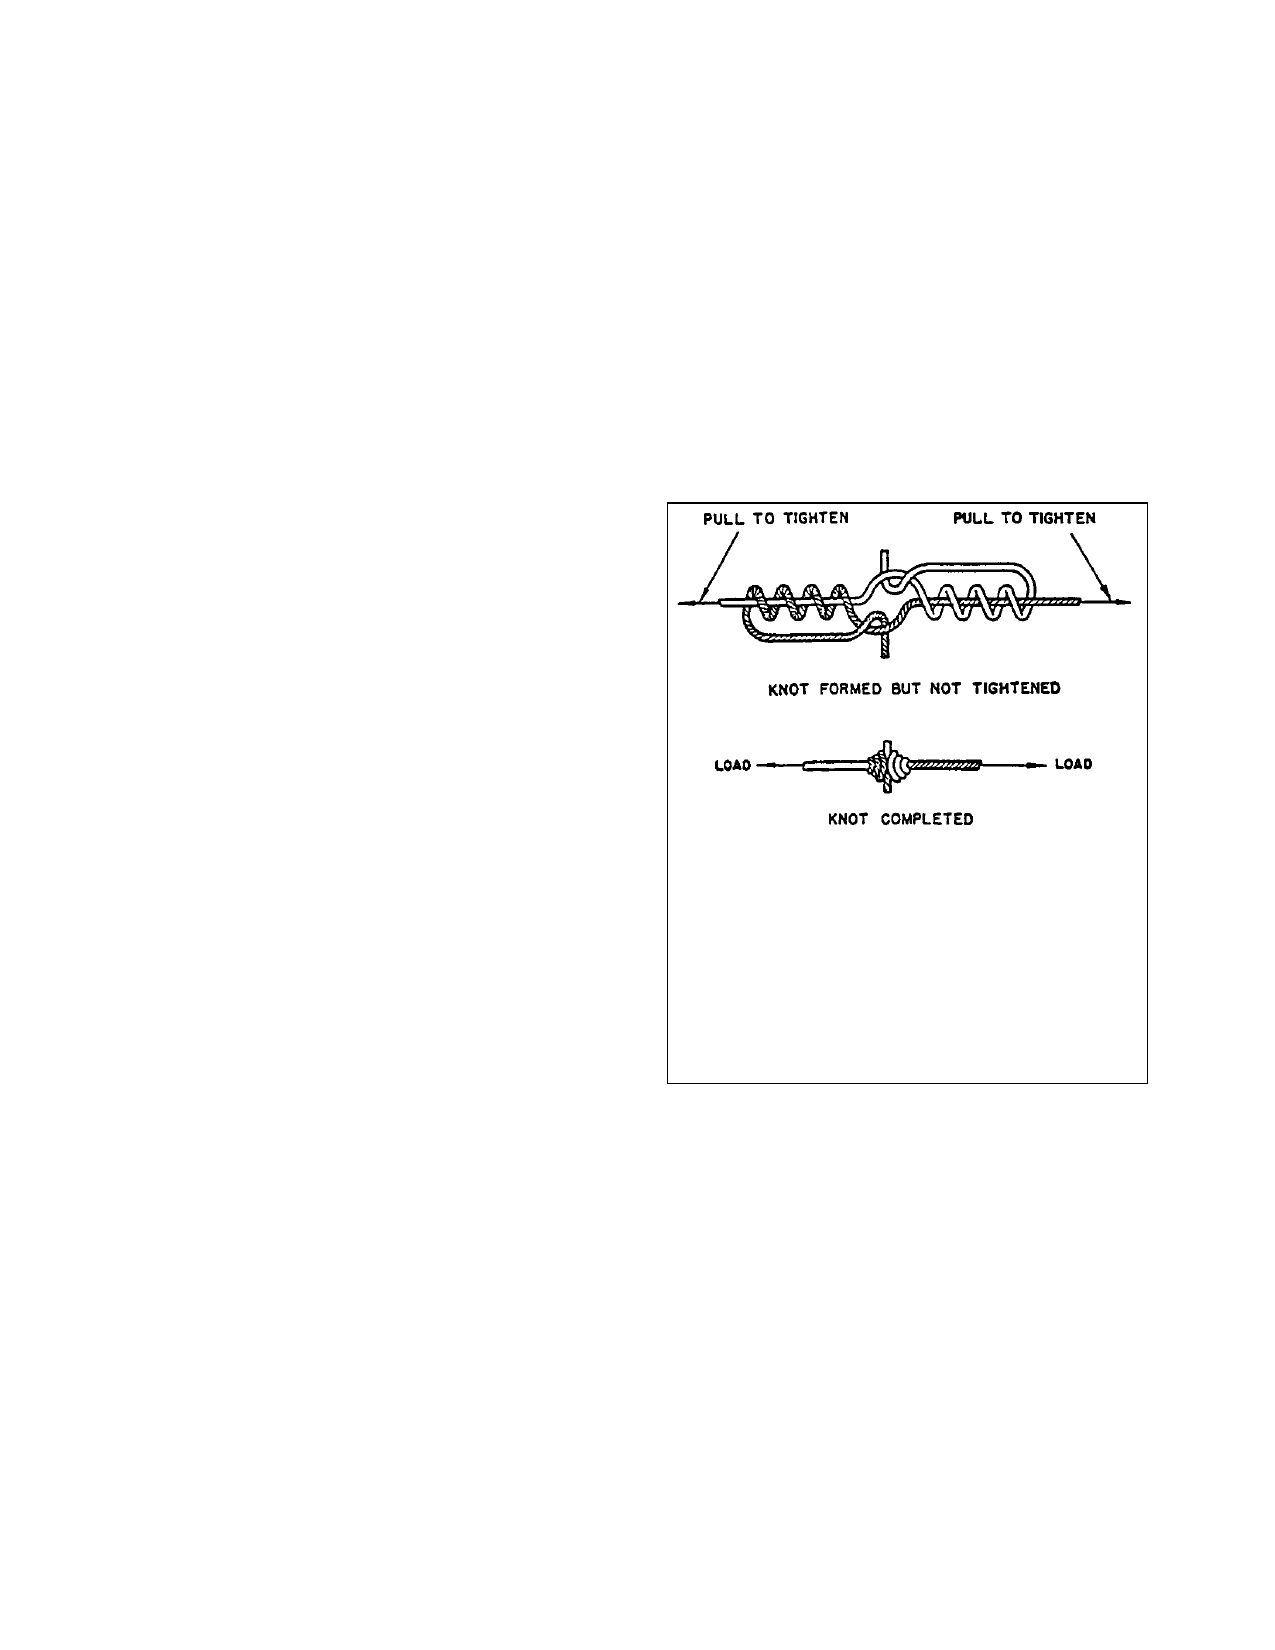
The splice knot is made by crossing the
ends of the cord, and making four complete
wraps with the small end of the free piece around
the end of the standing piece. The end is then
doubled back through the formed loop. The
other free end is wrapped and doubled back.
The long ends of the cords are then pulled until
the knot is tight. The short ends are cut close to
the knot. This finishes the splice knot.
FIGURE 2-10. Splice knot.
2-11. STITCH SPACING.
a. Rib lace spacing on wings, formerly
referred to as stitch spacing, should be no
greater than the spacing used by the original
aircraft manufacturer. When the original
spacing cannot be determined the maximum
spacing illustrated in figure 2-12 should be
used on the wings and wing control surfaces.
Par 2-10
Page 2-19