FAA Advisory Circular 43.13-1B
Acceptable Methods, Techniques, and Practices
Aircraft Inspection and Repair
AC 43.13-1B | 9. Aircraft Systems and Components | 3. Emergency Equipment | 9-49. Maintenance
9/27/01
AC 43.13-1B CHG 1
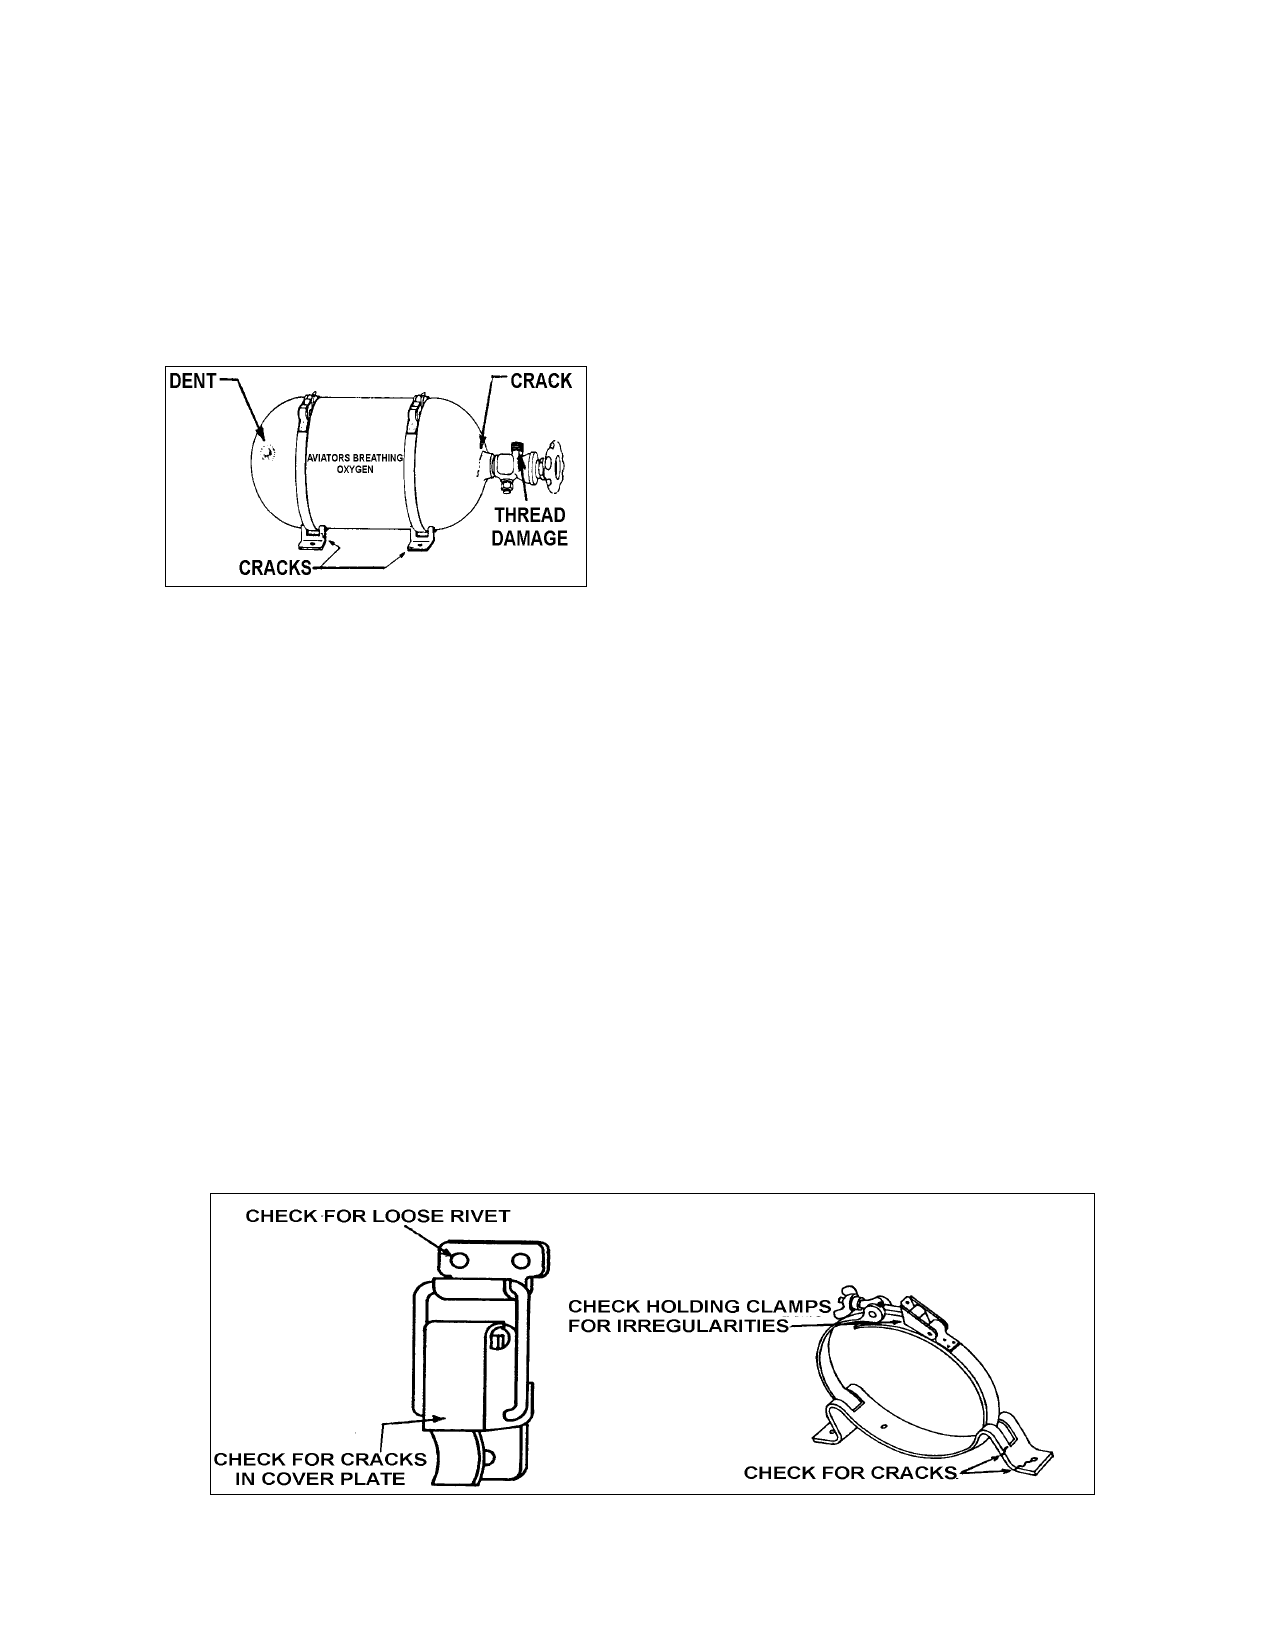
of oxygen cylinder damage are shown in fig-
ure 9-14.
(2) When replacing an oxygen cylinder,
be certain that the replacement cylinder is of
the same size and weight as the one removed.
with manufacturer’s standards. Replace the
cylinder straps or clamps that show wear or
abuse. For typical mounting bracket cracks
and failure, see figure 9-15.
b. Lines and Fittings.
(1) Replace any oxygen line that is
chafed, rusted, corroded, dented, cracked, or
kinked.
FIGURE 9-14. Oxygen cylinder damage.
NOTE: Cylinders having greater
weight or size will require strength-
ened cylinder mounting brackets and
a reevaluation to determine that the
larger or heavier cylinder will not in-
terfere with adjacent systems, compo-
nents, or structural members, and that
the strength of attaching structure is
adequate and any additional weight
will be computed into the aircraft’s
weight and balance report.
(3) Replace or repair any cylinder
mounting brackets that show signs of wear.
Visible cracks may be welded in accordance
(2) Clean oxygen system fittings
showing signs of rusting or corrosion in the
threaded area. To accomplish this, use a
cleaner recommended by manufacturers of
oxygen equipment. Replace lines and fittings
that cannot be cleaned.
(a) The high-pressure lines which are
located between the oxygen bottle (outside the
oxygen service filler) and the regulator are
normally fabricated from stainless steel or
thick-wall, seamless copper alloy tubing. The
fittings on high-pressure lines are normally sil-
ver brazed.
NOTE: Use silver alloys free of cad-
mium when silver brazing. The use of
silver brazing alloys, which contain
cadmium, will emit a poisonous gas
when heated to a molten state. This
gas is extremely hazardous to health if
inhaled.
FIGURE 9-15. Cylinder brackets and clamps.
Par 9-49
Page 9-39