FAA Advisory Circular 43.13-1B
Acceptable Methods, Techniques, and Practices
Aircraft Inspection and Repair
AC 43.13-1B | 1. Wood Structure | 4. Repairs | 1-51. Types of Patches
9/8/98
AC 43.13-1B
FIGURE 1-13. Splayed patch.
(c) A hole, the exact size of the in-
side circle of the scarf patch, is made in the
block, and is centered over the trimmed area of
damage.
(d) The block is removed, after the
adhesive on the patch has set, leaving a flush
surface to the repaired skin.
(4) Steps in making a scarf patch when
the back of the skin is not accessible are as
follows:
(a) After removing damaged sec-
tions, install backing strips, as shown in fig-
ure 1-16, along all edges that are not fully
backed by a rib or a spar. To prevent warping
of the skin, backing strips should be made of a
soft-textured plywood, such as yellow poplar
or spruce rather than solid wood. All junctions
between backing strips and ribs or spars should
have the end of the backing strip supported by
a saddle gusset of plywood.
remove and replace the old gusset plate with a
new saddle gusset, or it may be necessary to
nail a saddle gusset over the original gusset.
(c) Attach nailing strips to hold
backing strips in place while the adhesive sets.
Use a bucking bar, where necessary, to provide
support for nailing. After the backing strips
are fully bonded, install the patch.
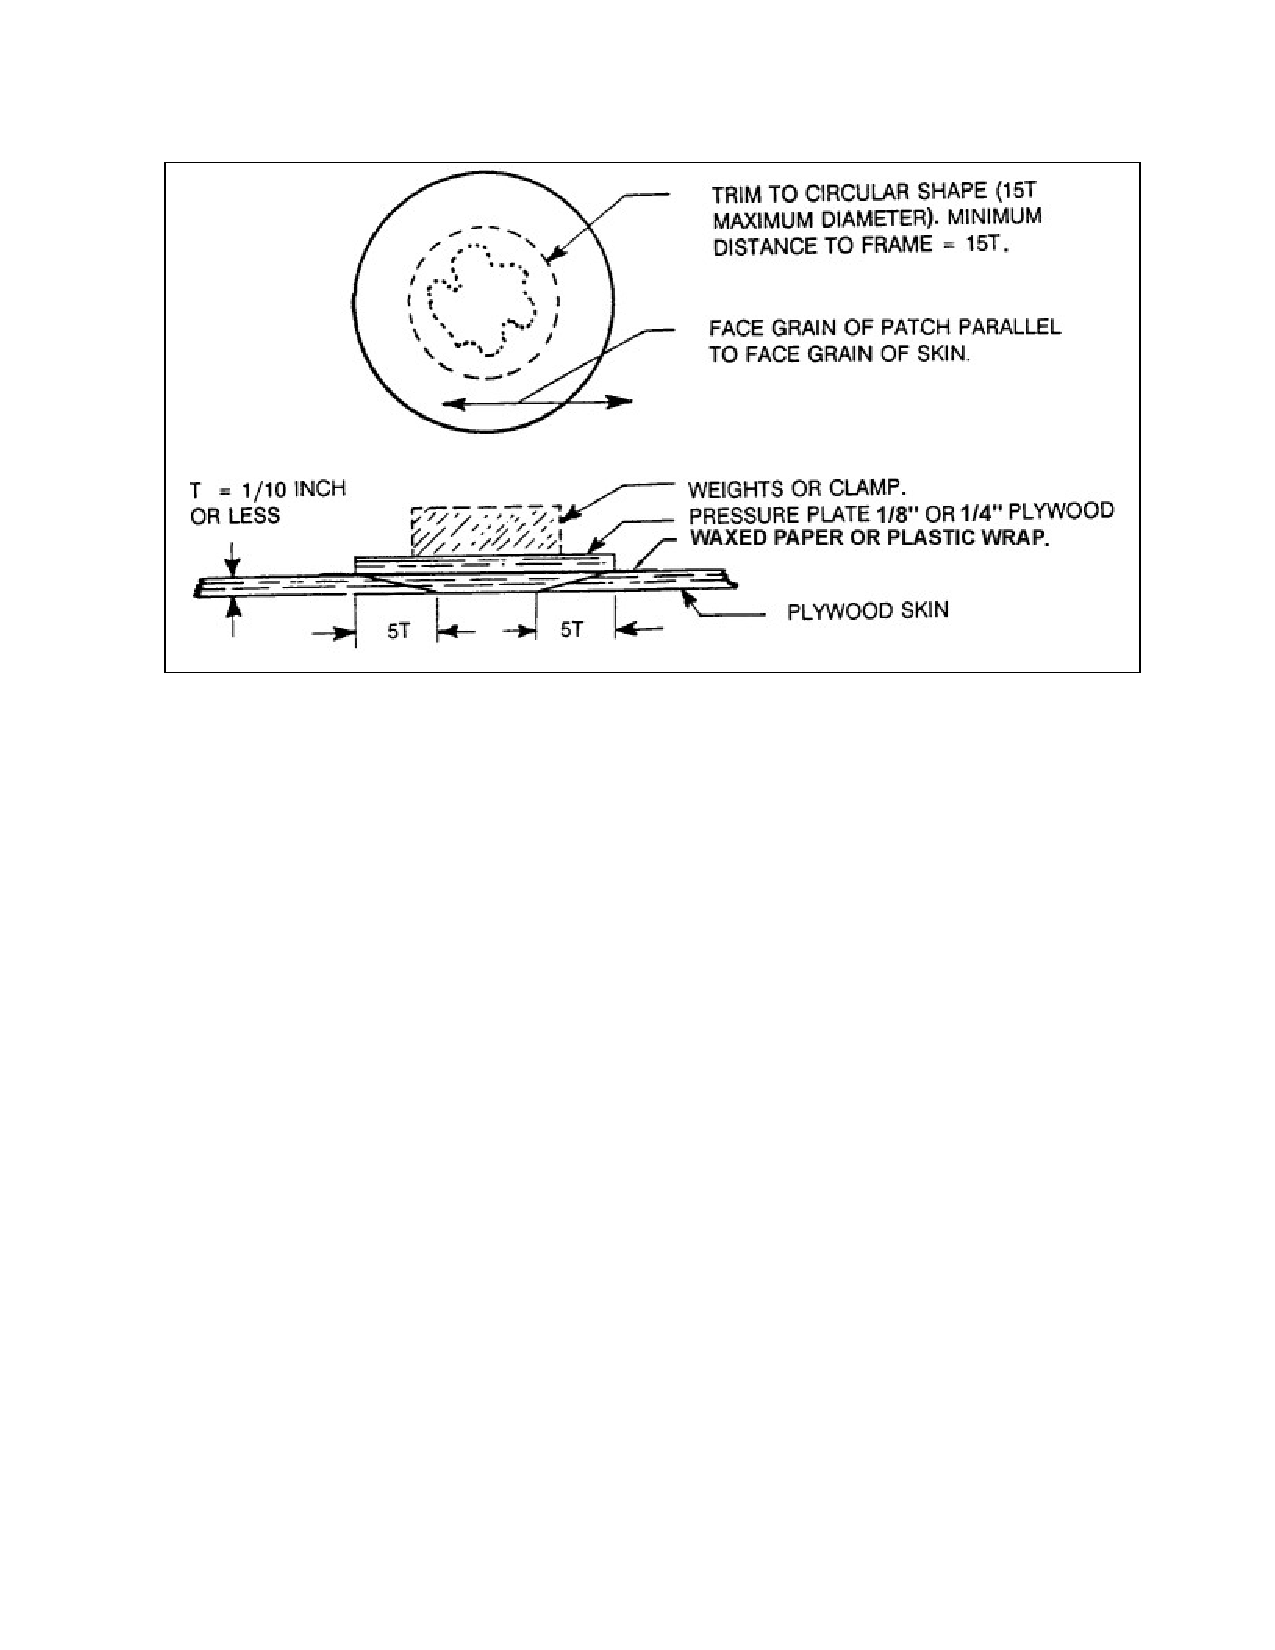
d. Plug Patch. Either oval or round plug
patches may be used on plywood skins pro-
vided the damage can be covered by the
patches whose dimensions are given in fig-
ure 1-17 and figure 1-18. The plug patch is
strictly a skin repair, and should be used only
for damage that does not involve the support-
ing structure under the skin. The face-grain di-
rection of the finished patch must match the
surrounding skin.
(1) Steps in making an oval plug patch
are as follows:
(b) If needed, nail and bond the new
(a) Explore the area about the hole to
gusset plate to rib. It may be necessary to be sure it lies at least the width of the oval
Par 1-51
Page 1-27